One of the major reasons that I built a Puddle Duck Racer, and then a Mouse Boat was that both of these boats are under 8 feet long. That meant that I could easily purchase lumber that was as long or longer than the length of the boat. I did this because I assumed that joining pieces of plywood or timber was difficult.
It certainly seemed difficult. Most books on boat building spend a significant amount of text on the subject, and the Internet is full of jigs and strategies for scarfing lumber and plywood. Pre-built kits get around the need for scarfing plywood with fancy cutouts that allow the pieces to fit together like puzzle pieces. A bit of fiberglass and resin over the top and the joint becomes the strongest part of the sheet. Of course, I knew right away that this sort of precision was right out for me. Not to mention the fact that I want to steer clear of epoxy so that I feel more comfortable getting kids involved.
I knew when I started building a Lazy Weekend canoe that I was going to have to join lengths of plywood. Once that was decided I simply had to decide how I was going to join the plywood. In the end, I decided that I would try the least technical of all the plywood joining techniques. The butt joint. A butt joint basically consists of two pieces of plywood butted up next to each other, with a third piece of plywood on top that holds everything together like this:

Under most boat building situation this apparently works just fine. The biggest problem with the butt joint is that it is very ugly. Not only does it tend to leave a crack on the outside of the joined plank, and a big ugly bandage looking spot on the inside of the joined plank, it also bends funny because it is twice as thick as the normal plywood.

Originally, I had planned to put a strip (or three) of fiberglass drywall tape bedded down with Titebond II over the outside of the plank. However, the joint turned out so well that I am probably just going to paint over it now. I made the butt part of the joint over-wide, but that doesn’t really hurt my feelings.
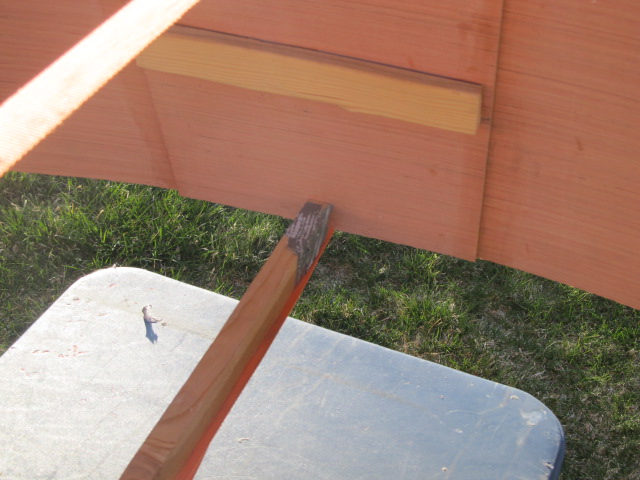
Apparently I don’t have a picture of the outside of the joint, but that’s OK, there really isn’t much to see. The crack is a tiny hair line well filled with Titebond II. As long as you are joining the factory edges of 5mm thick plywood I don’t think that you have anything to worry about. If you don’t mind the way that these joints look, then they are very simple to do.