I am not a naval architect, but designing boats is sort of fun. My pdracer is inexpensive enough that I am more than happy to experiment, and at some point I am hoping that experimentation includes some racing. To me, that’s the beauty of the Puddle Duck Racer. They are easy and inexpensive to build, but there is nothing stopping you from treating them like a real sailboat.
This winter I had a list of changes that I wanted to make before it was time to hit the water again. I had already dealt with the two most important issues, the delaminated rudder, and the gunter jaws that were prone to breaking. So this last weekend I took a bit of a break from remodeling my laundry closet to play with the leeboard.
My original leeboard design was based around several Internet articles saying that the submerged area of the leeboard should be 4% of the sail area. As far as I can tell this number originated with Jim Michalak (who might well have borrowed the figure from Bolger). Whoever it was that came up with the number, they probably used some maths, so that’s good enough for me. I knew how much sail I wanted to carry, and so it was easy to decide how much leeboard to use.
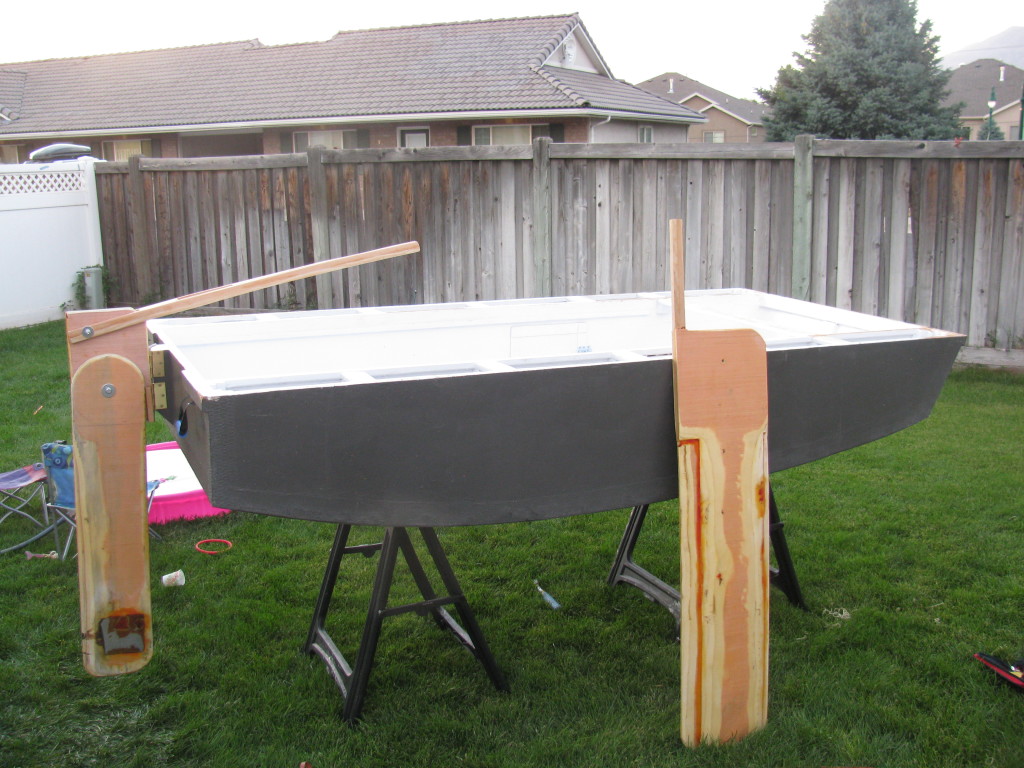
My leeboard design was based around two basic design principles. The first was that I wanted to carry a lot of sail, so I needed a lot of leeboard. The second was that I wanted to build the leeboard out of plywood laminations. To get the most board out of the plywood I wanted a board that was no more than 4 feet long. As a secondary concern I also preferred a longer thinner board over a short fat board, as performance was important to me.
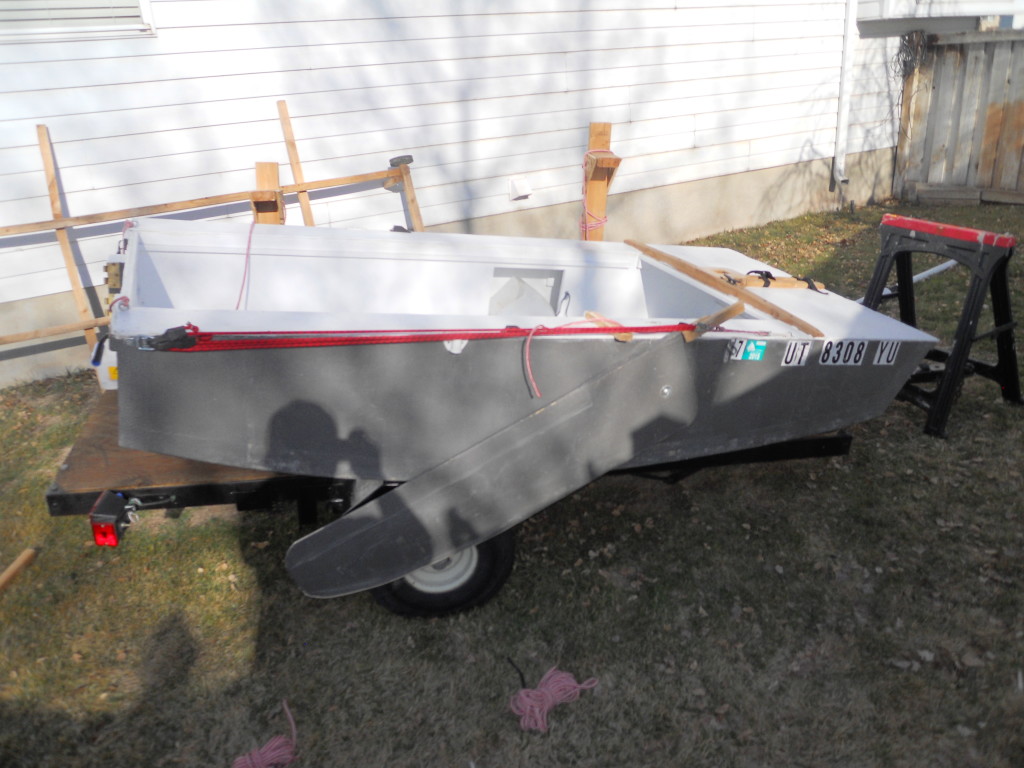
This desire lead to the first of many compromises I made. If you look closely at Nephi’s Courage you will see that the top of the leeboard does not line up with the sheer line of the boat. I did this because every inch that I lowered the board gave me another square foot of wetted surface without having to create a leeboard that was longer than four foot. The leeboard was already going to use over half of a sheet of plywood. If I had to cut the board out the other direction it was going to waste significant portions of 2 sheets of plywood.

At some point while designing the leeboard, I read an article on Duckworks about building a proper NACA foil blade out of plywood laminations. This lead to a further refinement of my design. Instead of 5 laminations of the same size. I cut the sheets of plywood out so that I could sand down all of the proud bits and end up with a foil shape. Or at least that was the plan.

I was at least partially foiled (ha ha) in my attempts to build perfect NACA foils by the fact that I had run out of winter. Add to that the fact that I don’t own a power planer or even a belt sander, and shaping foils becomes a fair bit of work. As fun as it was making these fins, what I really wanted to do was go sailing, So, I decided these foils were “good enough.” In retrospect that was clearly the right choice. Summer time is for sailing. There is plenty of time for alterations to the boat once the snow starts to fall. Plus, it is hard to know what really needs adjusting until you get the boat out on the water.
For example, when I originally launched Nephi’s Courage I didn’t have any hardware at all to keep the leeboard down. I didn’t even have a stop. This wasn’t because I hadn’t seen plenty of pictures of ducks with elaborate leeboard setups, but because I was in a hurry, and wasn’t sure what I really needed. Besides, as a child I had done all of my sailing in areas where it got four or five feet deep really quickly, and once it got deep, it stayed deep. Because of this previous experience I wasn’t particularly concerned about what the leeboard did when it touched the bottom.
Once I actually started sailing, shallow water became very important. Where I launch at Utah Lake it takes a couple hundred yards from the beach before I can deploy my leeboard fully, and the place where I launched at Bear Lake was nearly as shallow. Plus, where I sailed at Bear Lake had shallow patches even farther away from shore. I would be sailing along great and all of a sudden the leeboard would kick completely up (sometimes with a fair amount of force), and things would get crazy.
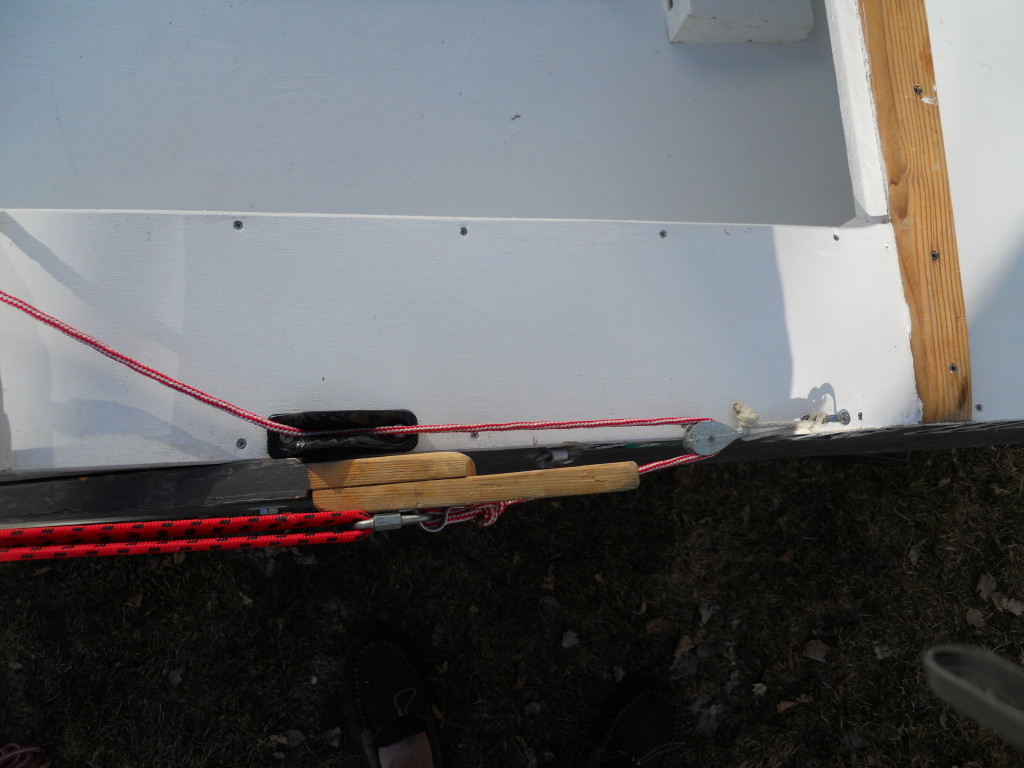
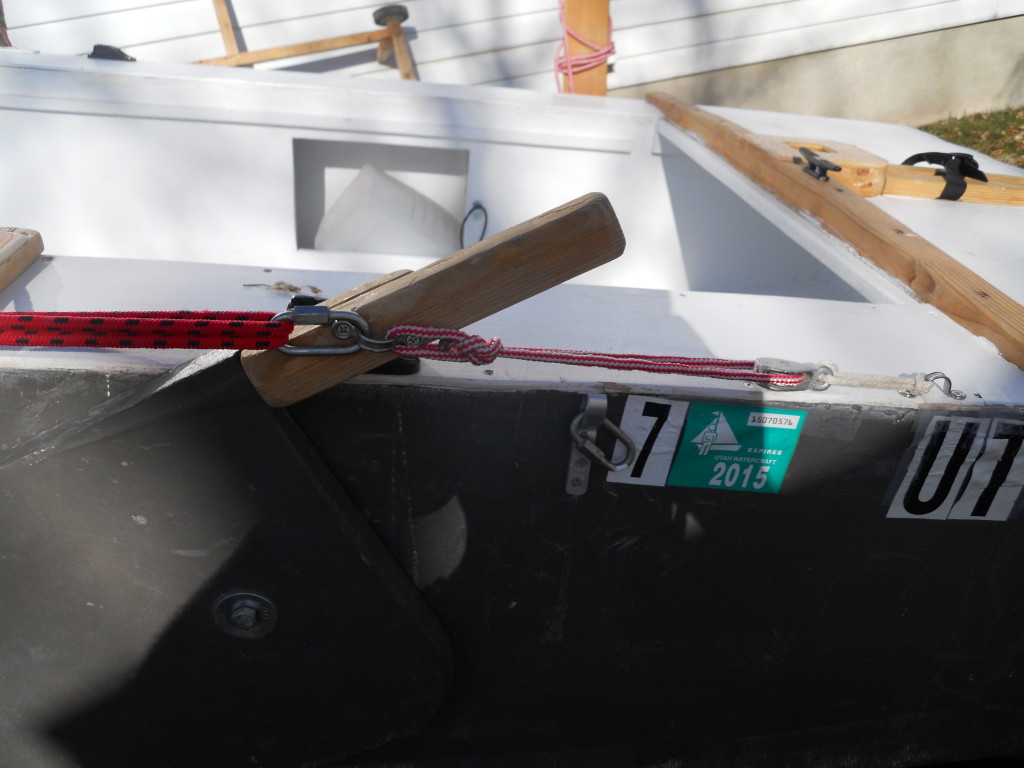
What I needed was a way to set the leeboard at a certain depth and position and then have it go back to that position if I happened to touch the bottom. This is what I came up with.


The system is actually pretty simple, and it works surprisingly well. The bungee cord pulls the leeboard handle backwards deploying the leeboard. A line pulls the leeboard handle forward keeping the board deployed in whatever position it has been set in. If the board strikes the bottom then it can fold backwards without any problem, and once the obstacle has been cleared the bungee cord will pull the leeboard back to its set position.
There are some minor issues with the system. The bungee cord provides enough force that setting the leeboard is best done with two hands (one on the leeboard handle, and one to set the line in the clam cleat). When I put less force on the bungee and it did not deploy the leeboard reliably. This also means that it doesn’t take much contact with the bottom for the dragging leeboard to bring the boat to a complete stop. This is quite unlike the weighted rudder, that would happily drag across the bottom in even the lightest of winds. After having to repair a delaminated rudder that was almost certainly the direct result of its having been dragged for hundreds of yards every time I beached the boat I am not sure that the leeboard doesn’t do the right thing. I am happy to adjust the leeboard if I run aground as long as I don’t have to worry about the leeboard disintegrating.
The astute readers will also notice that the front bottom corner of the leeboard has been softened and the curve made much more gradual. I made that modification this winter, and I have yet to see if it affects how the boat sails. I removed the corner in the hopes that it would make the leeboard more effective in shallow water. The problem with the old corner was that it touched the bottom before much of the board was even in the water. I am hoping that the removal of the corner will allow me to get more of the board in the water when the water is really shallow. After playing with the new board this appears to be the case. However, I haven’t sailed the boat with the new leeboard, so it remains to be seen if the board is actually effective in shallow water. It also remains to be seen if the leeboard modifications alter how well the leeboard performs when it is all of the way down.
On the bright side, I have already been on the water once this year, and so it is probably only a matter of time before I actually get to go sailing. As you can probably imagine, I will keep you posted.
One response to “Puddle Duck Racer Refit — Leeboard”
Nice details. I shall use this if I ever get around to building something. (in addition to picking your brain)